WooCommerce Fakturoid Connector plugin documentation
In the following steps, we will guide you through the installation and setup process of the module so that you can get it up and running quickly and easily.
After purchasing the plugin, you will receive an email. The mail contains the registration number and the plugin
woocommerce-fakturoid-connector.zip
The plugin is not unpacked and remains in ZIP format.
INSTALLATION
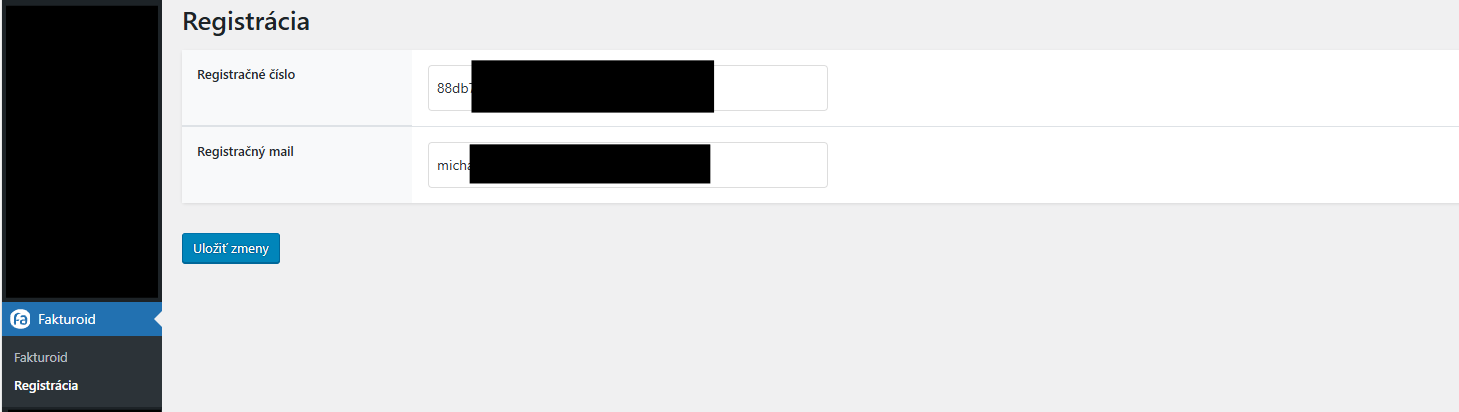
In your WordPress admin, go to Plugins > Add New Plugin and there is an Upload Plugin button at the top of the page. Once pressed, you click on the Select File button where you then paste the file you received in the mail. You click on Install now and then Activate plugin. Once activated, you will find the Fakturoid folder in the left menu where after clicking on Fakturoid > Registration you will enter the registration number you received after purchase and the email address you received the confirmation to. Click on the “Save Changes” button to activate the plugin. Done
In case of problems with the installation, this procedure with pictures is described in this article.

SUBSCRIBE
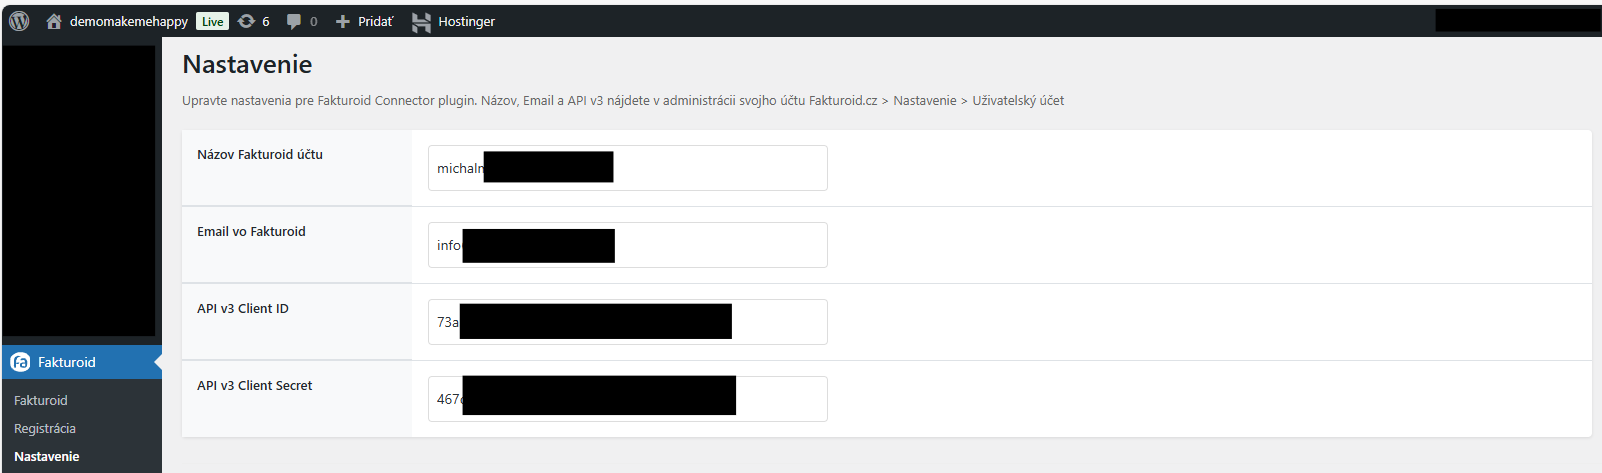
After registering the plugin, the next step is to connect to your Fakturodi.cz account. In the left menu click on Faktroid > Settings

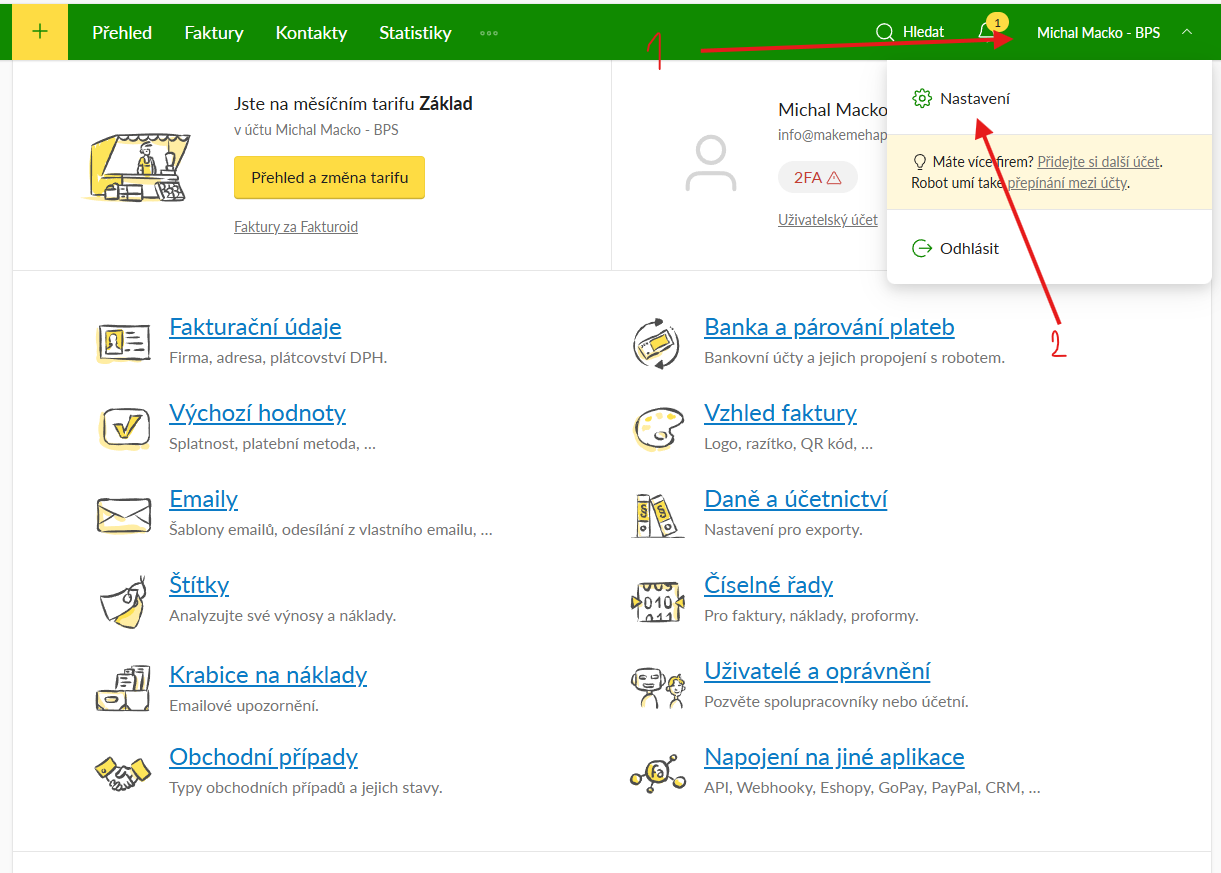
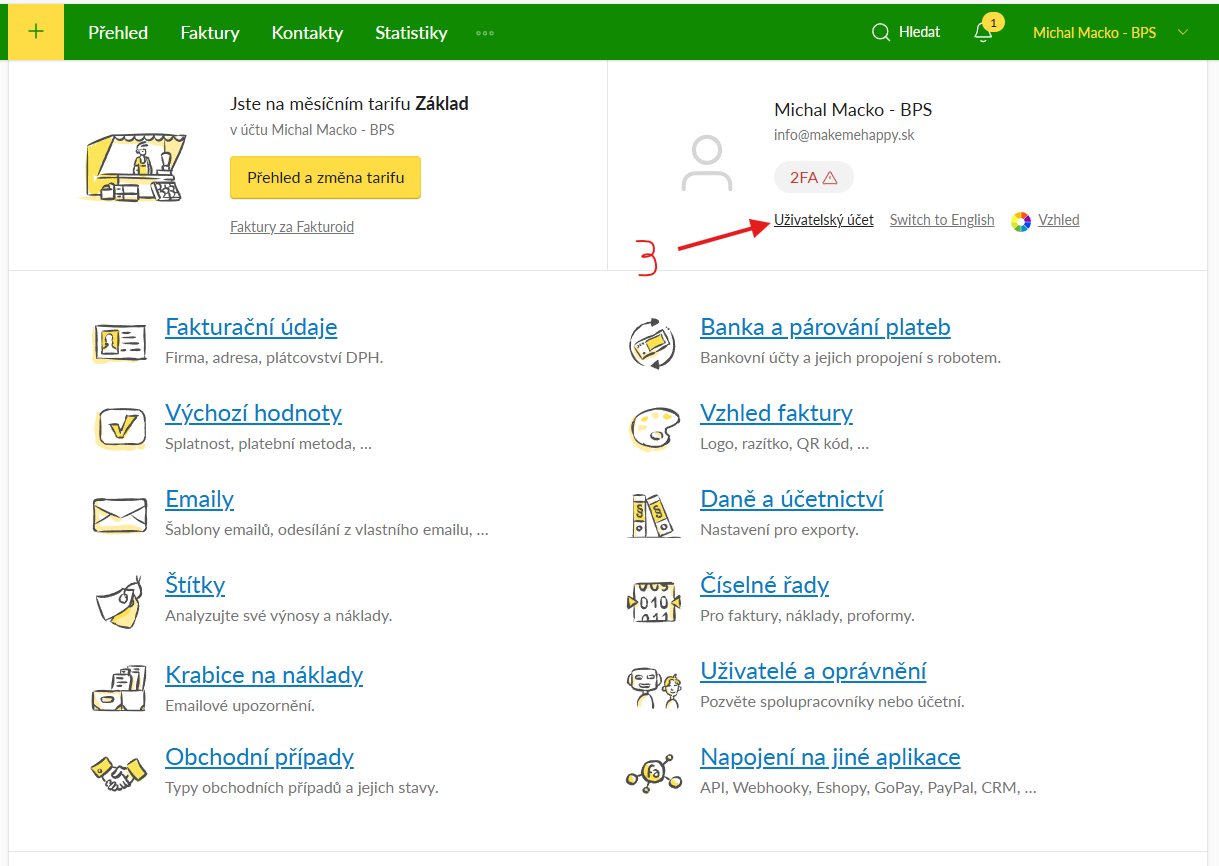
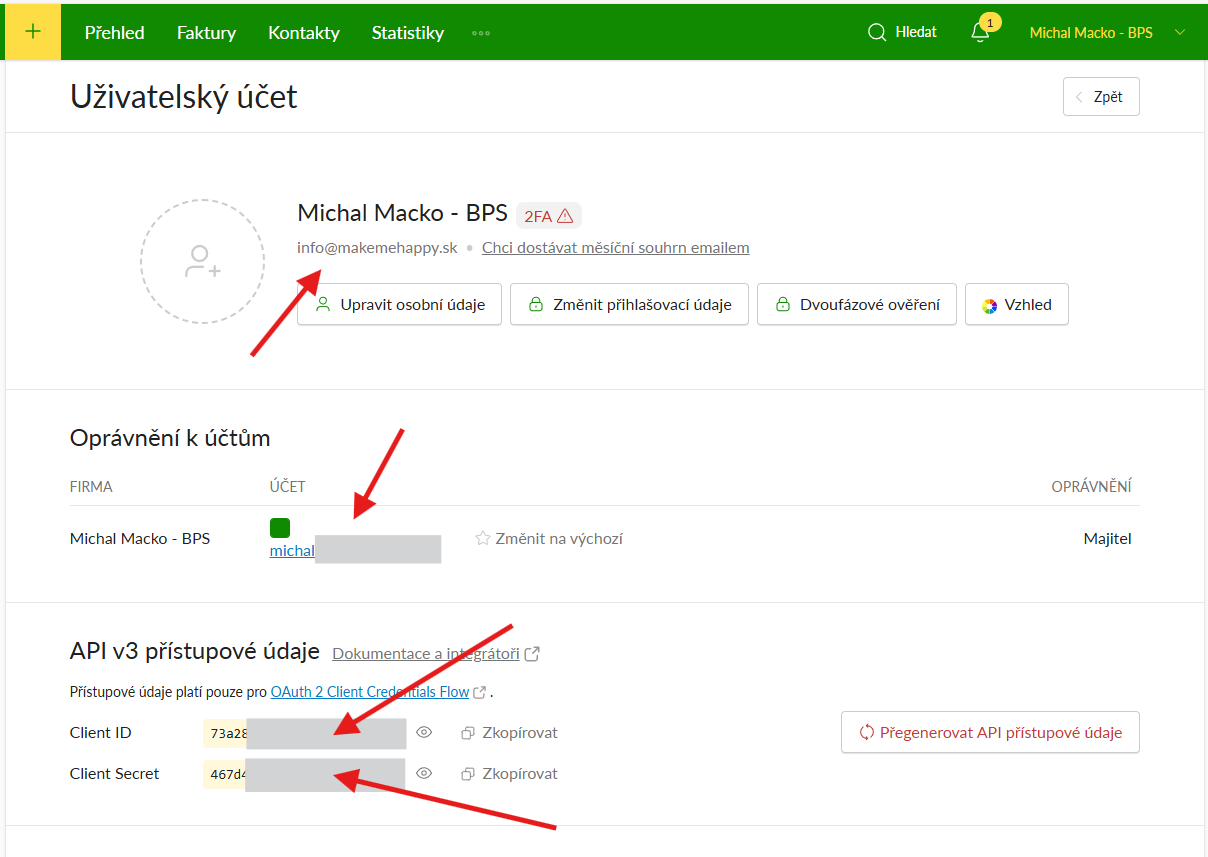
You can find your login details that you need to enter here at https://app.fakturoid.cz/login after logging in on the home page by clicking on the company name. Once completed, click on the “Save Changes” button. Done.


MAKING A NEW CONTACT
If this option is checked, the system will automatically create a new contact when processing the order. If the option is not checked, the system will first search for an existing contact by name and email address. If such a contact is found, it will use it to process the order further.

DOCUMENTS ISSUED FOR DOWNLOAD
Each document that is issued is automatically attached to the email as an attachment.
PAYMENT METHODS
Assign your e-shop payment methods to Fakturoid payment methods. You also need to assign the payment method to the payment methods in your e-shop.

VARIABLE SYMBOL
The variable symbol is the order number used automatically.
LANGUAGE OF FACTS
Specifies the language in which the invoice environment will be created

CREATION OF AN ADVANCE INVOICE
Assign a payment method to the order status to create an advance invoice. We recommend the payment method Direct deposit to account
INVOICE CREATION
Assign a payment method to the order status to create a current invoice.
MARKING THE ADVANCE INVOICE AS PAID
Assign the order status at which the advance invoice should be marked as paid and a current invoice will be issued automatically.

MARKING THE INVOICE AS PAID
Assign the order status at which the regular invoice should be marked as paid.

ISSUING A CANCELLATION INVOICE
Assign the order status for which a cancellation invoice is to be issued.

After creating an order, you can download the issued documents in the administration of the e-shop.

You can also download the issued documents in the plugin Fakturoid > Documents. Here it is also possible to download documents in bulk as a ZIP file
