





Woocommerce Invoices-online connector

WooCommerce Fakturyweb.cz Connector
Woocommerce Invoice-online / Invouryweb connector documentation
The plugin is compatible with SK version of Invoice-online.com Also CZ version of Fakturyweb.cz
In the following steps, we will guide you through the installation and setup process of the module so that you can get it up and running quickly and easily.
After purchasing the plugin, you will receive an email. The mail contains the registration number and the plugin
woocommerce-invoicesonline-connector.zip
The plugin is not unpacked and remains in ZIP format.
INSTALLATION
In your WordPress administration, go to Plugins > Add New Plugin and here at the top
of the page there is a button Upload plugin. Once pressed, click on the Select File button where you can then
insert the file you received in the mail. Click Install Now and then Activate Plugin. After
activation, you will find in the left menu the folder Invoices Online where you can enter after clicking on Invoicesonline
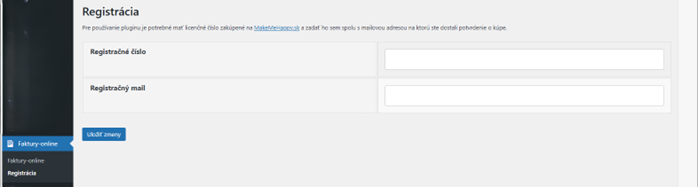
> Registration registration number you received after purchase and the email address you
have received confirmation. Click the “Save Changes” button to activate the plugin. Done
In case of problems with the installation, this procedure with pictures is described in this article.
SUBSCRIBE
After registering the plugin, the next step is to connect to invoices-online.com. In the left menu click on Invoices-Online > Login
After registering the plugin, the next step is to connect to fakturyweb.cz. In the left menu click on Fakturyweb > Login

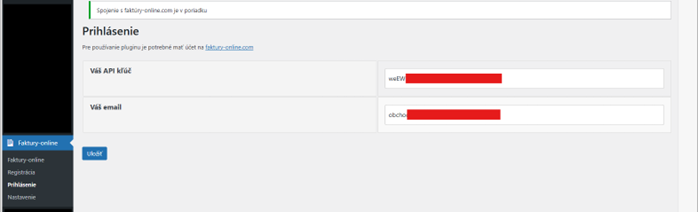
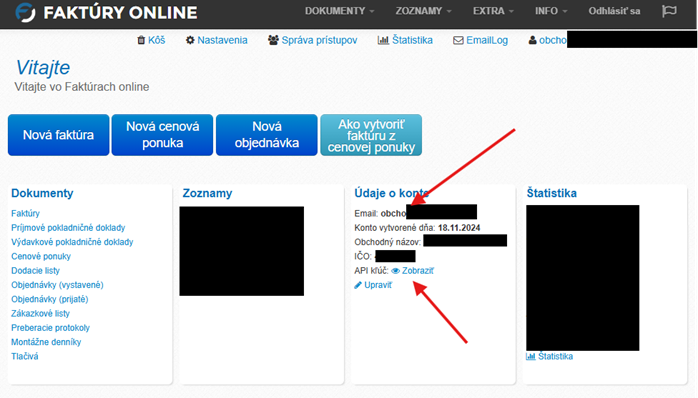
You can find your login details that you need to enter here at https://www.faktury online.com/welcome or for the cz version at https://www.fakturyweb.cz/vitejte after logging in on the home page in the Account Details window. Once completed, click on the “Save Changes” button. Done.
SETUP
The next step is to fill in your details which will be displayed on the invoice. In the left menu, click Invoices Online > Settings.
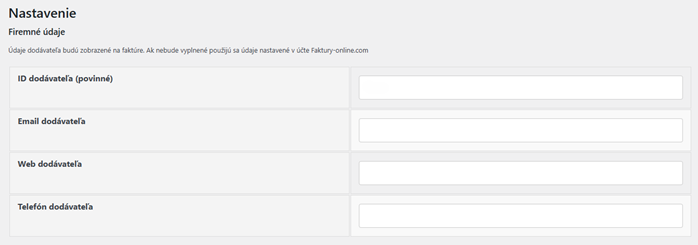
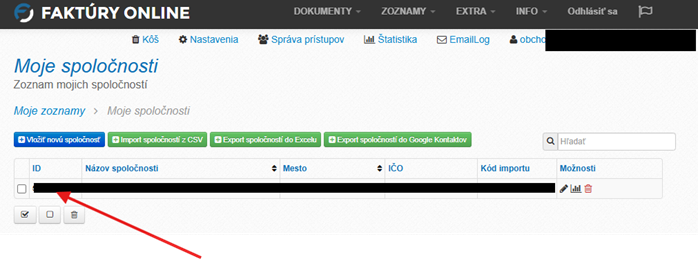
The first field is the supplier ID
This figure can be found https://www.faktury-online.com/moje-zoznamy/zoznam-spolocnosti
For the CZ version on https://www.fakturyweb.cz/moje-seznamy/seznam-spolecnosti
All other fields are filled in and the data you enter here will be used on the invoice you create. The data you enter may be different from the data you have in your profile on invoicesonline.com. For example, you may use a different email address or supplier website. Finally, you need to save the data by clicking on the “Save Changes” button. Done.
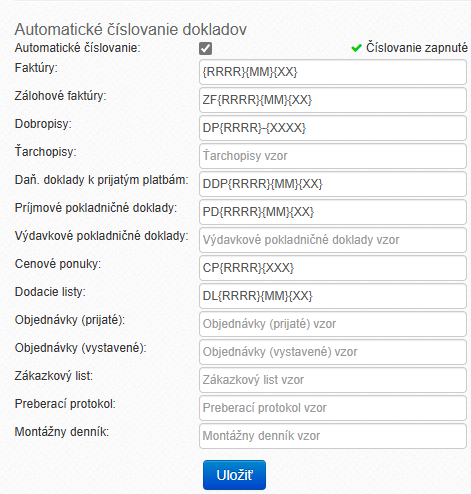
If you have just started using invoices-online, we recommend you to set up all the data carefully. Don't forget about automatic document numbering, as the plugin will automatically increment the XX figure when invoices are created.
Here it is important that you in the automatic numbering have not used number format with slash. This is bad ZF/{XXXX}. This is correct ZF{XXXX}
BANK ACCOUNT
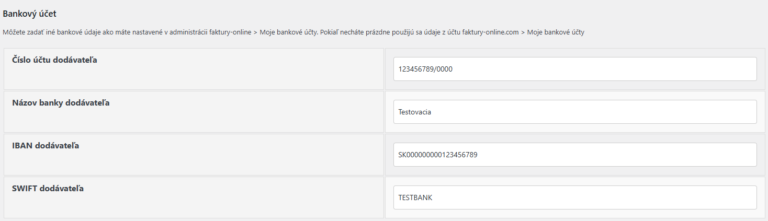
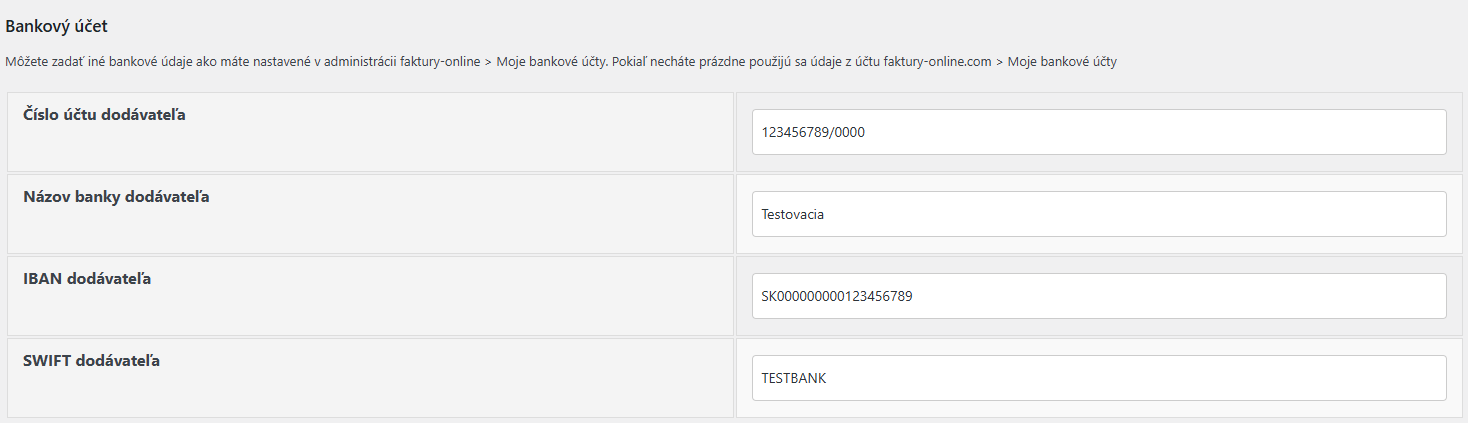
You can enter payment details if you want to use different details for payments from the shop. If you want to use the bank details from the „My bank accounts“ settings in invoices-online.com leave the fields blank

DETAILS ON THE INVOICE
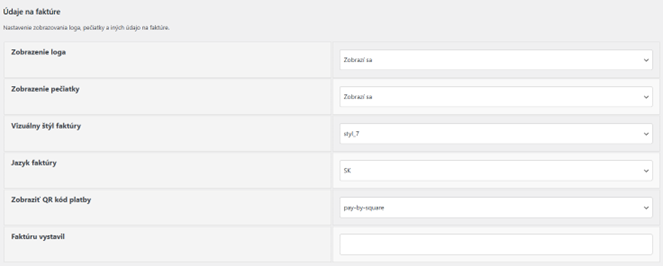
Logo display:
You can set the display of the logo on the invoice that you have stored in your invoice-online account
Stamp display:
You can set to display a stamp on an invoice you have stored in your invoice-online account
Visual style of the invoice:
Choose your desired invoice style
Invoice language:
The invoice will be issued in the selected language
View QR code for payment:
You can choose the QR code to be displayed on the invoice or turn it off
He issued the invoice:
You can indicate the figure that will be stamped on the invoice
PAYMENT METHODS
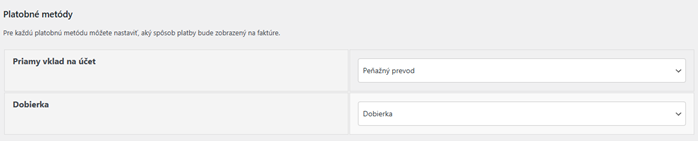
Assign the payment method to your e-shop with the correct designation on the invoice.
INVOICE CREATION

You choose the payment type and the order status at which the invoice will be issued.
CREATION OF AN ADVANCE INVOICE


You select the payment type and order status at which the advance invoice will be issued.
MARKING THE INVOICE AS PAID
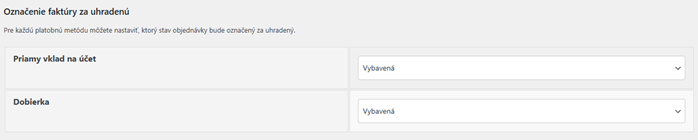
You can choose at which status the invoice is marked as paid.
MARKING THE ADVANCE INVOICE AS PAID


You can choose at which status the advance invoice is marked as paid and a crisp invoice is automatically issued.
OTHER
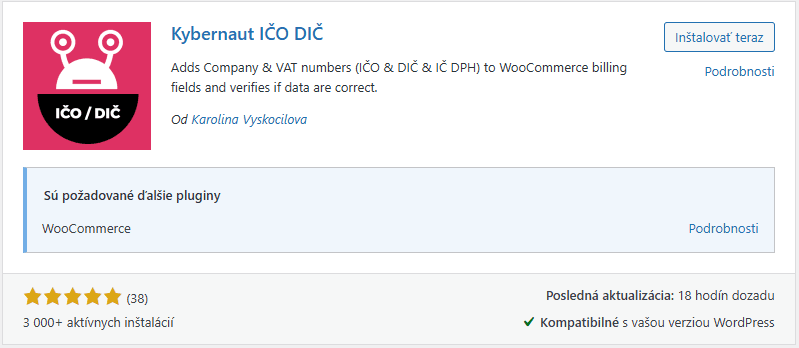
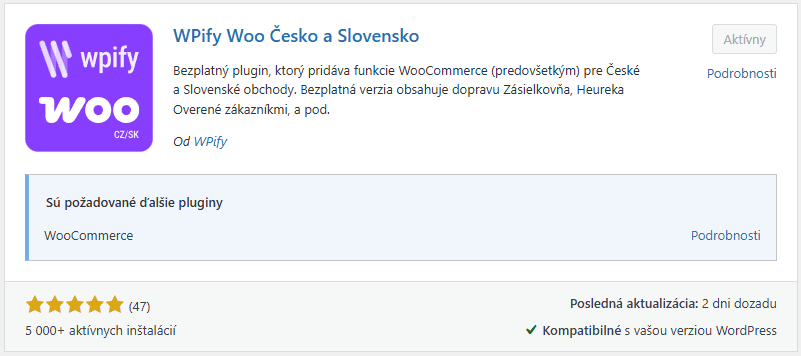
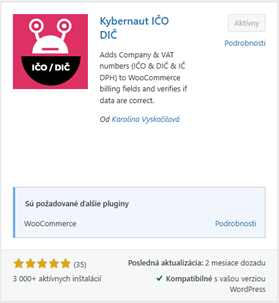
For proper display of customer billing data we recommend using the plugin from Karolína Vyskočilová „Kybernaut VAT ID“, or WPify Woo Czech Republic and Slovakia from WPify.
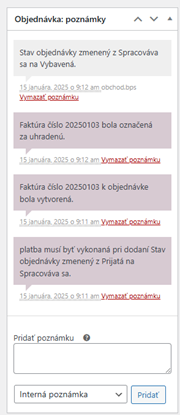
After each invoice is issued or paid, the status is entered in the order notes. If there is a problem and the invoice is not issued, you will also be informed of this in the notes
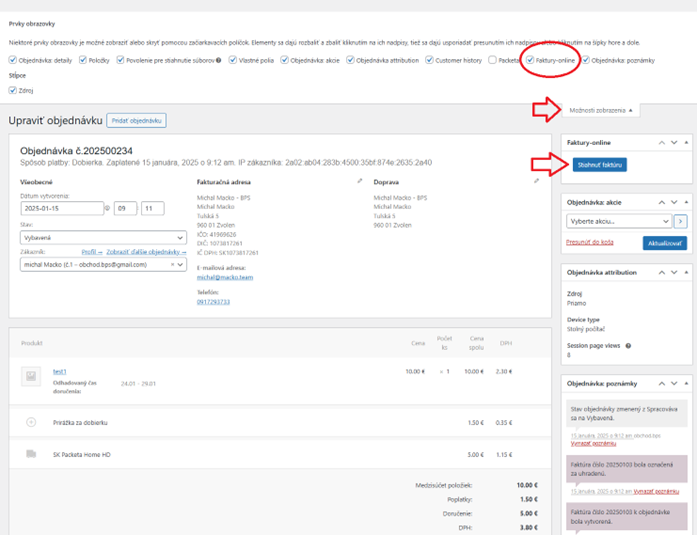
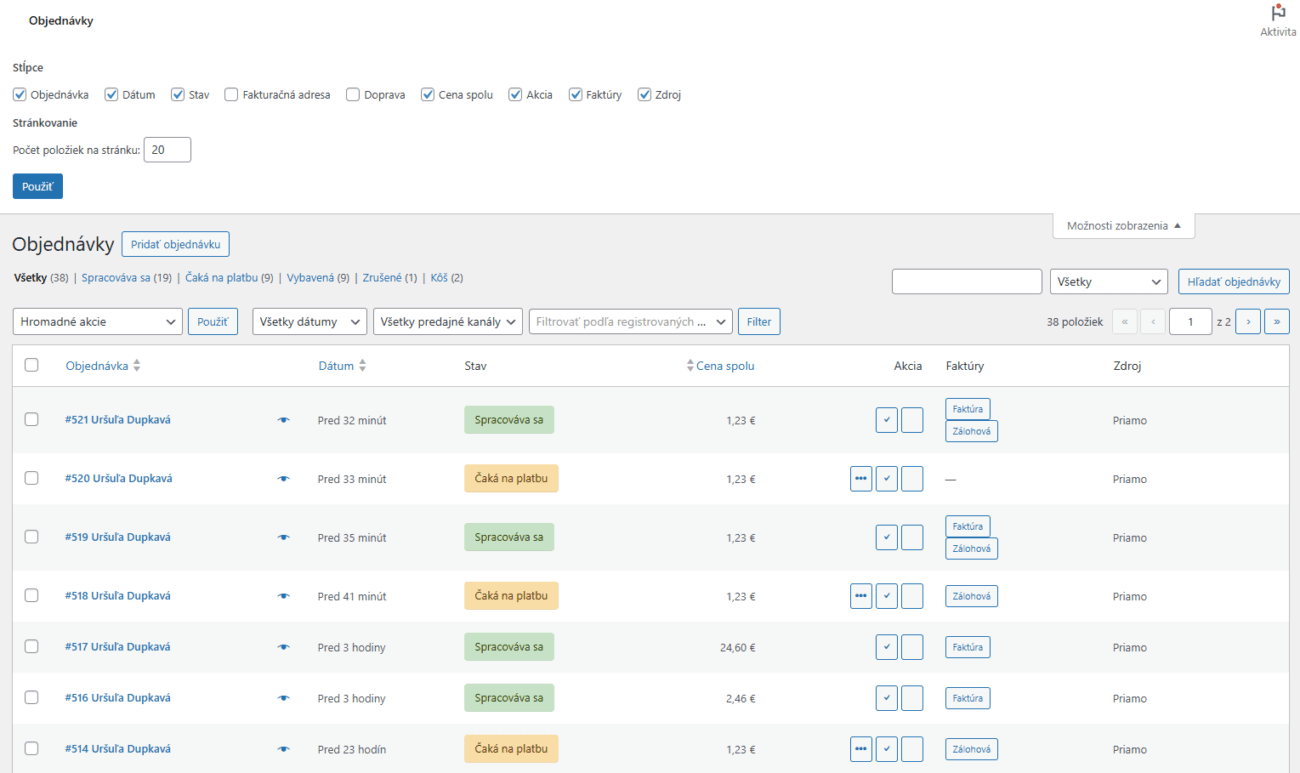
The issued invoice can also be downloaded in the order details. The download window can be disabled in the top section „Display options“ and by unchecking Invoice-online.
ADDING A FORM FOR DISPLAYING ISSUED DOCUMENTS TO THE ORDER

[wfoc_document_retrieval]You can embed a form on the page via shortcode that will allow a non-logged in user to view the created invoice or backup invoice.
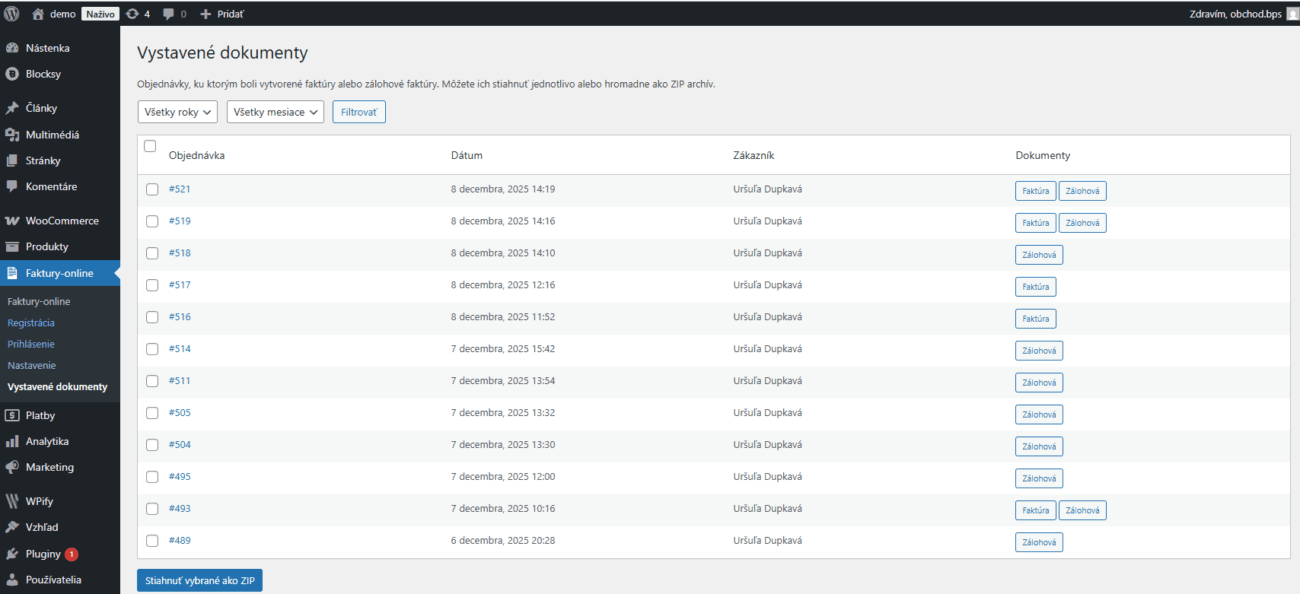
DOWNLOADING INVOICES IN THE E-SHOP ADMINISTRATION
Since version 2.3, downloading of issued invoices and invoices is available directly in the e-shop. The button will only appear for documents issued from version 2.3 and above.
A NOTE UNDER THE INVOICE ITEMS
You can add a custom note under the items of the crisp invoice according to the payment method. For example, when paying on delivery, you can inform the customer...

Added option to manually issue an invoice in case of an error.
This option has been added since version 2.4.5. If an error occurs in the communication between the e-shop and the invoice-online.com server, in this case the „Issue invoice manually“ button will be displayed in the Invoice-online window in the order details. When clicked, the plugin will try to re-issue the document that should have been issued when the error occurred. After such successful issuance, you will be notified in a note and the issued document will be attached to the customer in subsequent emails.

