
How to Connect WooCommerce to Faktury-online.com and Fakturyweb.cz
Do you want to generate invoices from WooCommerce orders without having to manually enter the data? In this guide, you'll set up a connection to Invoices-online.com or Fakturyweb.cz, rules for issuing documents and making them available to customers. At the end, you'll find a checklist and solutions to the most common problems.
Choose the right product: WooCommerce Faktury-online Connector for Faktury-online.com or WooCommerce Fakturyweb.cz Connector for Fakturyweb.cz. The instructions are the same for all products; use the package and registration information that came with your product.
Some screenshots show older versions. Menu names and the availability of advanced features may vary depending on the version you have installed. The images are intended to supplement the instructions; they do not replace checking your own settings.
What You'll Find in the Manual
- What to Prepare
- Installing and Registering the Plugin
- Linking a Slovak or Czech Account
- Supplier Information and Numbering
- Bank Account and Invoice Information
- Payment Methods and Listing Rules
- Verification of Data and Documents When Placing an Order
- Document Search Form
- Downloading the PDF and delivering it to the customer
- Step-by-Step Setup Test
- Troubleshooting and Support
What to Prepare Before Setting It Up
- A fully functional WordPress site with WooCommerce enabled and administrator access.
- The plugin and registration information included with the purchased product.
- An account with the corresponding service, Faktury-online.com or Fakturyweb.cz, and its login credentials.
- Correct supplier information, bank account details, and document numbering settings in the invoicing service.
- A decision specifying under which order status and payment method an invoice or advance invoice should be generated.
Before updating the plugin, create a backup of your website. Try the initial setup and order processing on a test store and with test data, if your billing environment allows it. Do not attempt to process the same order repeatedly on a real customer order.
Even a test e-shop connected to a production billing account can generate a real invoice. A WordPress test site, therefore, does not in and of itself constitute a test billing environment.
1. Install and register the plugin
- Download the ZIP file that came with your product. Do not unzip it before uploading.
- In WordPress, open Plugins → Add New Plugin → Upload Plugin, select the ZIP file, and click Install Now.
- After installing the plugin, activate it.
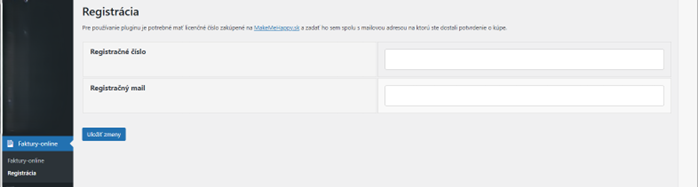
- In the plugin's registration section, enter the registration number provided and the email address used during the purchase. Save your changes and verify the registration status.
You can also find an illustrated general procedure in the article How to Install a Plugin from a ZIP File.
2. Link the correct billing account
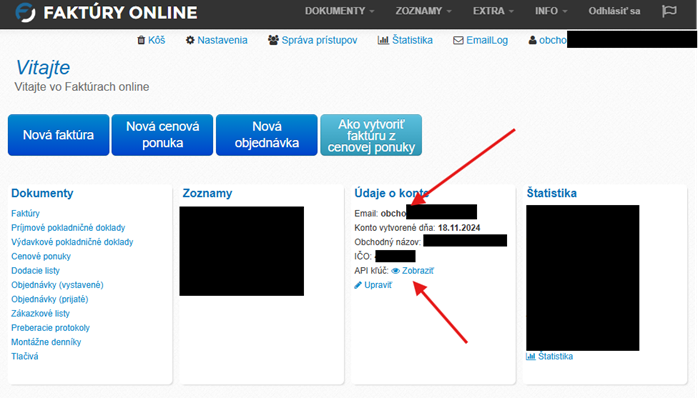
Faktury-online.com: Open Invoices-Online → Log In. You can find the connection details after logging in to the service in the Account Information on Faktury-online.com.
Fakturyweb.cz: Open Fakturyweb → Log In and use the information from your account to Fakturyweb.cz. Do not mix up the details of the Slovak and Czech accounts.

Fill in the connection fields with your account information, then click Save changes and verify the result. Do not disclose your login credentials in comments, email screenshots, or support tickets.
3. Fill in the supplier's information and check the numbering
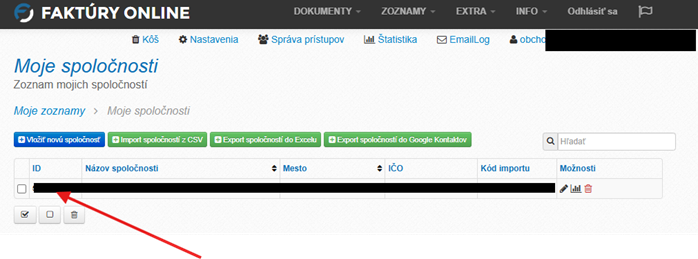
In the plugin settings, fill in Supplier ID and the data to be transferred to the document. You can find the ID in the list of companies: Faktury-online.com – List of Companies or Fakturyweb.cz – List of Companies.
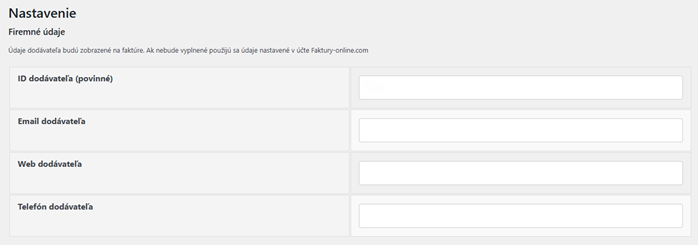
Check the name, address, contact information, and company details. The information configured in the plugin is used when creating a document; for example, the contact email or website may differ from the information in your billing service profile. Save your changes.
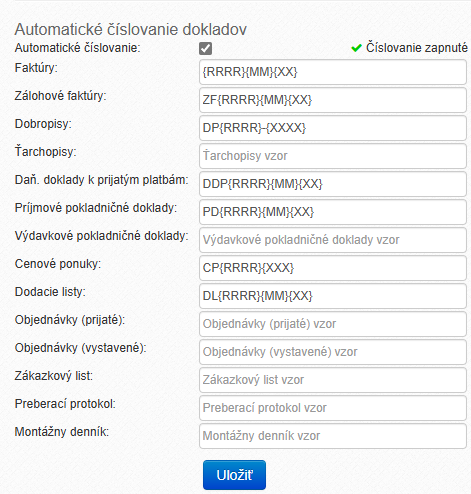
Document Numbering: Before issuing your first invoice, set up and verify automatic numbering in the invoicing service. For this integration, do not use a slash in the number format: instead of ZF/{XXXX} For example, use ZF{XXXX}. Check the entire final format on the test document.
4. Set up a bank account
If the documents are to include payment details different from those in the billing service's default account, enter them in the plugin settings. If you want to use the details from the section My Bank Accounts In the billing service, leave the relevant fields blank. Always verify the final amount on the issued document.
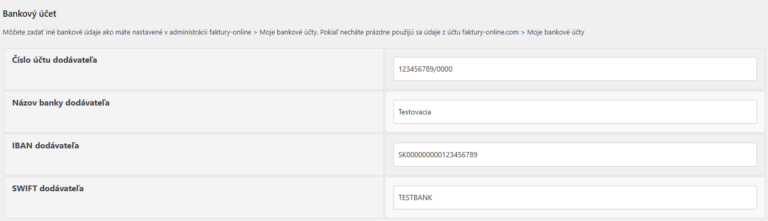

5. Choose the invoice's layout and content
Based on the available options, configure the logo, stamp, visual style, document language, display of the payment QR code, and the „Invoice issued by“ field. The logo and stamp are based on the files stored in the billing account. If your version offers a due date, check it for both the invoice and the advance invoice.
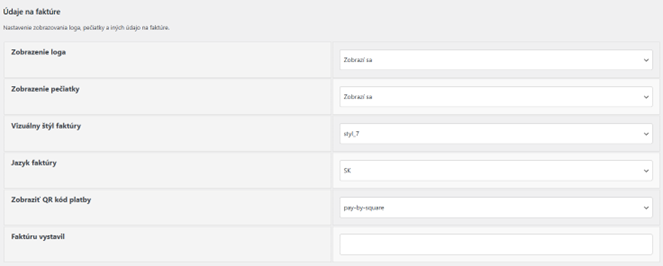
The QR code on the invoice is a different feature from the QR code displayed directly with a WooCommerce order. If you need a QR code for a bank transfer after placing an order, see A separate guide to PAY by Square in WooCommerce.
6. Assign payment methods and billing rules
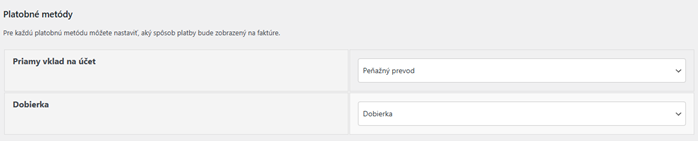
Assign the e-shop's payment methods to the correct payment designation on the invoice. Then configure which order statuses should trigger the creation of documents or mark them as paid. Check the rules separately for each payment method used.
Creating an Invoice
Select a payment method and an order status that will trigger the issuance of an invoice. Use this exact combination during the test.

Creating a Pro forma Invoice
If you use advance invoices, set their trigger status separately. Verify that the combination of rules does not generate documents at a time other than when you need them.

Marking an Invoice as Paid
Select the order status at which the invoice should be marked as paid. This rule is based on the order status, not on verification that the funds have been received by the bank. When making a bank transfer, verify the payments using your usual procedure.
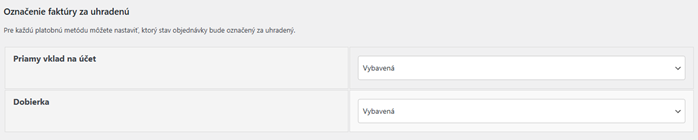
Payment of an Advance Invoice and Subsequent Invoice
For an advance invoice, you can specify the status at which it will be marked as paid and an invoice will subsequently be generated. Here, too, verify the specific sequence of statuses on the control order. Do not change the status of the actual order just to test the invoicing process.

7. Check the information and documents when placing an order
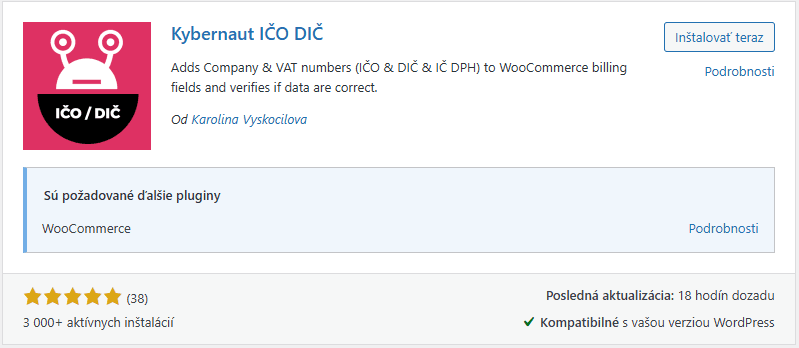
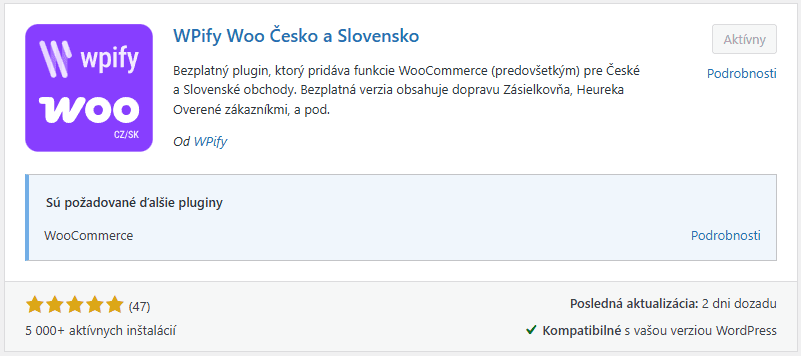
For business customers, also verify that the company ID number (IČO), tax ID number (DIČ), and other billing fields are transferred correctly. If you are already using the Kybernaut IČO DIČ add-on or WPify Woo Czech Republic and Slovakia, check the resulting data on the order summary and the invoice.
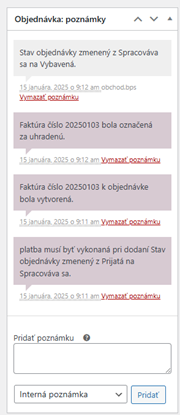
The result of issuing or modifying a payment is recorded in order notes. If the document is not generated, start by reviewing these notes. They also contain information about communication or issuance errors.
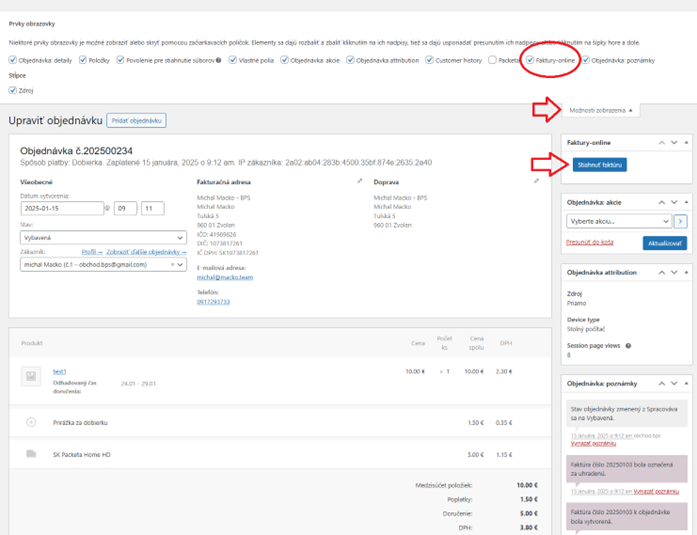
You can also download the available document from the order details page. If you don't see the panel, check Display Options and enabling the "Invoices Online" panel.
8. Optionally, add a form for searching for a document
In the version that includes this feature, you can insert a block into a separate page Abbreviated code with the following text. The form allows even unregistered customers to search for documents already issued for an order after entering the required information. It does not issue new invoices on its own.
[wfoc_document_retrieval]

9. Verify the PDF and send it to the customer
Depending on the plugin's settings and version, documents are available via a link in the order confirmation, a button in the customer's email, or on the page after the order is placed. Attaching a PDF to an email „Equipped“ This is a separate optional feature: make sure it is enabled and that the document is created before the email is sent.
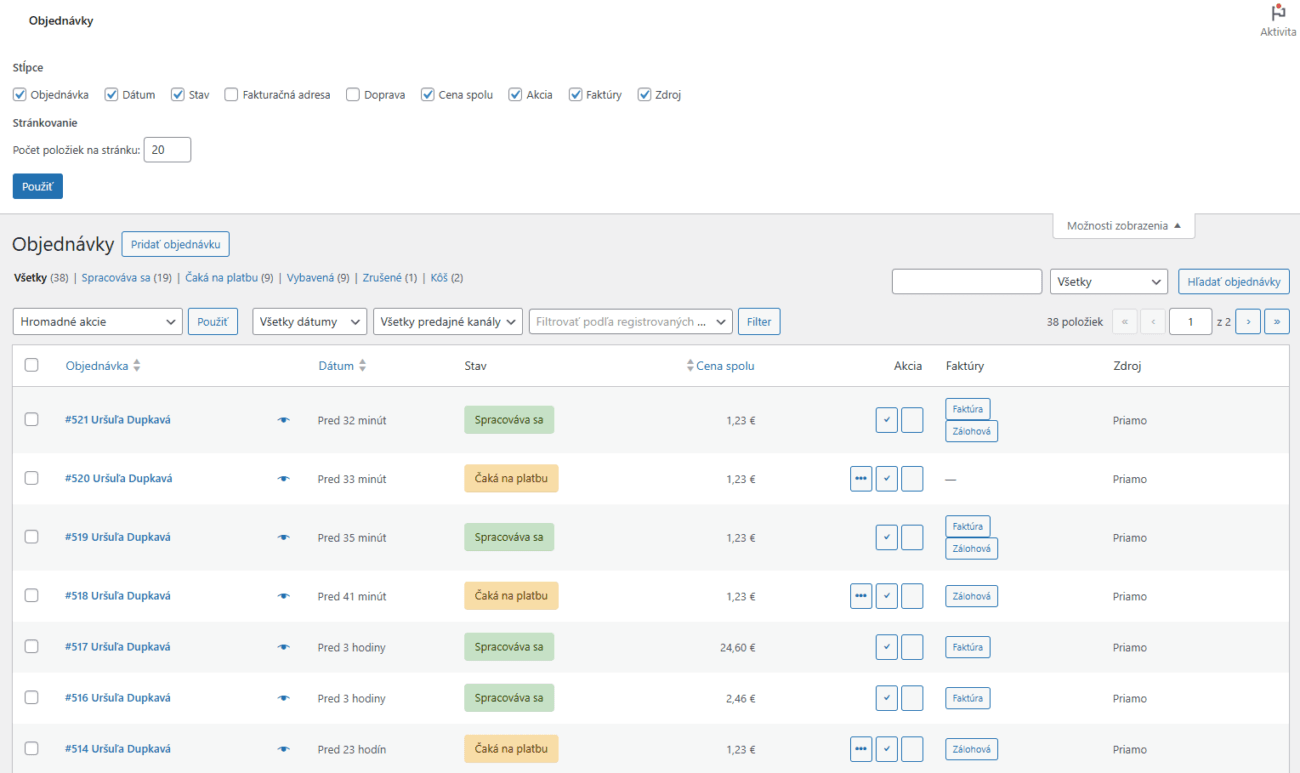
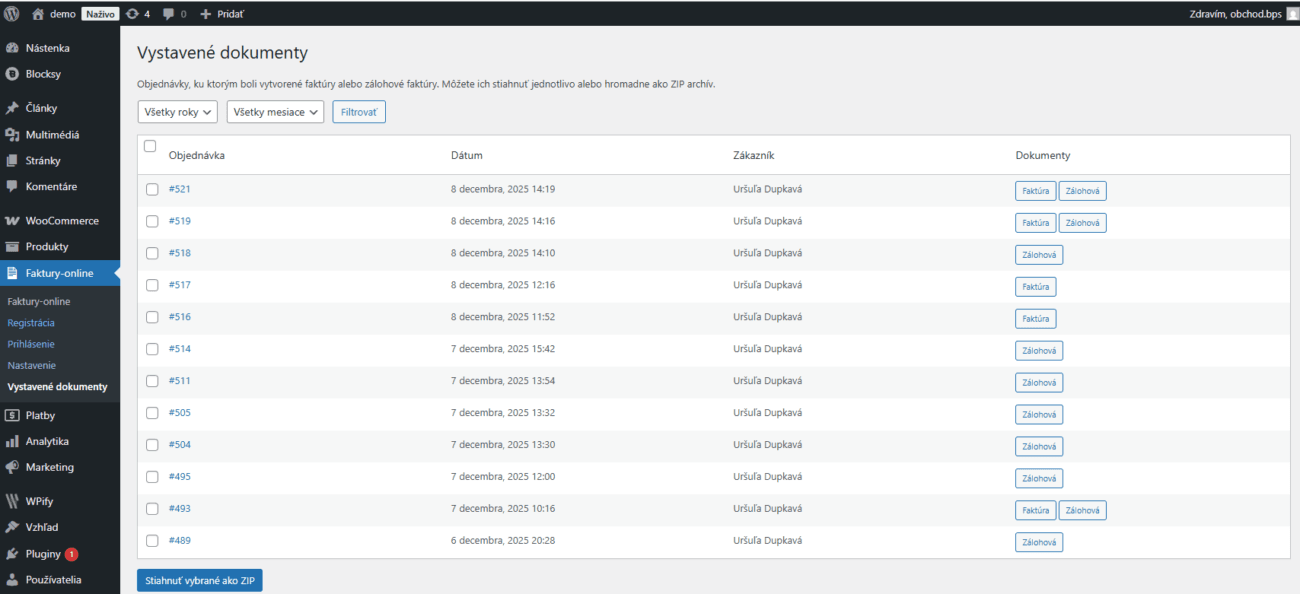
The administrative transfer of documents is described in the original manual starting with version 2.3 for documents issued using this version or a later one. In the section Documents on Display A bulk download in ZIP format is also available. In older versions or with older documents, not all buttons may be available.
Notes under invoice line items
If your version includes this option, you can add text to the invoice line items based on the payment method—for example, information about cash on delivery. Check the text in the final PDF.

10. Test the entire process using a test order
- Use the test store and your own test data, if possible. Select the payment method for which you have set up the rule.
- Verify the initial status of the order and set up the prepared test sequence of statuses.
- Once the order has reached the "Pending" status, open the order notes and review the results of the order placement.
- Open the generated document in the invoicing service, as well as its PDF. Check the supplier, customer, line items, shipping, amounts, tax information, account, and numbering.
- If you are using a pro forma invoice, also verify the associated rule for the invoice and the payment reference.
- Check your customer account for the download link and any PDF attachment in the email for which you enabled this feature.
- Repeat the same check for other payment methods that have different rules.
When a receipt is not issued or the customer does not see it
The document was not created
Check the registration, connection to the correct service, supplier ID, and the payment method selected in relation to the order status. Review the order notes. If there is no record of successful issuance, resolve the issue before attempting to send the document to the customer.
Retry after a communication error
The original manual mentions a button starting with version 2.4.5 „Issue an invoice manually“, which appears when the relevant error occurs in the order details. First, check in the invoicing service to see if the document has already been created, and resolve the cause of the error. Then, use the available retry option and double-check the order notes to prevent duplicate invoicing.


The PDF or button is not in the email
Verify that the document was actually created, and check the date it was issued against the date the email was sent. The attachment for the „Processed“ email must be enabled separately; a missing attachment in another type of email does not in itself indicate an error in issuance.
Related Products and Help
- Faktury-online Connector – a product for Faktury-online.com
- Fakturyweb.cz Connector – a product for Fakturyweb.cz
- PAY by Square QR Payment After Placing an Order – Separate Instructions
- Contact and Setup Assistance
When submitting a support request, please include the product you are using, its version, your payment method, your order status, and an anonymized version of the error message. Do not send passwords, registration numbers, or complete customer documents.